Friday, June 12, 2009

Hot Peppers from the SW to the NW

This morning, shortly after finishing this, I talked with Tonia. (Is there anyone reading this who remembers "Talk With Tonia" and her blasted video camera?!)

T: What are you doing?
Me: Just finished making a surprise for you.
T: What is it?!
Me: If I told you, it wouldn't be a surprise.
T: If I guess the color, will you at least tell me I'm right?
Me: OK.
T: Blue?
Me: Yes. (hehe...I know she's not thinking denim)
T: And white, right?! (those are the colors in her kitchen)
Me: No.
T: Oh?

We chatted a little while longer, and she actually might be close with her guess from off-the-wall clues/comments that I made. She's going to tell me what she thinks it is after she receives the package, as not to spoil the excitement of giving a gift. It really is more fun to sew for others. That must be why I've had drapery fabric and lining, still on the bolts, for over a year and and half.

A while back I came across this tutorial by Betz White and knew I had to make this apron. Rummaging through my stash, I found some Robert Kaufman fabric, a black print from "Salsa Picante." That's when I knew that this would become a gardening apron for my friend, Tonia. She's been having fun with her first garden this spring. These peppers are appropriate...a touch of the desert that she left years ago.


I loved the appliques in the tutorial, so I included peppers that I cut out of fabric scraps. I used an applique stitch from my machine, then a zigzag and another decorative stitch for the pepper stems. It really took more time deciding where to place the peppers than it did sewing them onto the apron.


I also lined the apron and used bias tape that I made out of the pepper fabric for finishing. Happy gardening, Tonia!

Thursday, June 11, 2009

New Bath Mat

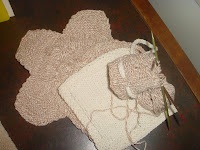
This was actually my first completed sewing project this summer. One of the joys of a sewer learning to knit (thank you, Kay!) is that suddenly sewing seems to become instant gratification. One of my crafty friends (a quilter!) from work sent me the link to this site, to show how she made a bath mat for her girls' bathroom. Here is my take on Sew Liberated's tutorial:


I have some kinks to work out with my techniques, but I hope to be able to do that when I make a bigger, matching rug for our bathroom. That said, I have two other very different rugs in the making. I have no clue where my current fascination with rugs came from, but I'm having fun.

Purse Pockets Tutorial


Materials List
1 pocket from old jeans, cut leaving a seam allowance around pocket
1 piece fabric, about an 8"x8" square, depending on pocket size
1 small piece coordinating ribbon, about 6"
Thread
Sewing machine
Zipper foot
Patience (see Step #10)


1. Cut out pocket of jeans, leaving as much fabric as you can around the sides and bottom of pocket. An inch would be ideal. The top can be less, since that's often dependent on the how close the pocket is to the back yoke. Cut out a piece of fabric the size of your cut pocket piece, plus an additional 1" to 1 1/2" in length. (See notes at end of tutorial.)

2. Place pocket and fabric right sides together. Sew the seam at the top of the pocket.


Use a zipper foot to sew the seam close to the top of the pocket. You can see where the edge of the zipper foot butts up against the top of the pocket.

3. Open up seam and press, then fold fabric over to the back of the pocket, leaving about 1/4" to 1/2" of fabric showing on front. You may need to trim your seam allowance to get the size you like.

4. Fold ribbon piece in half and place on an angle, as shown. Make sure the ends of the ribbon extend beyond the edges of the pocket.

5. Baste ribbon in place.

6. Fold in half, right sides together. Line up edges of the actual jeans pocket.

7. Pin sides and bottom together.

Look at the seam in my fabric...on the prototype I made, I didn't have the fabric extending over the top. I like this version much better.

And...hey! My pins coordinate with the fabric!

8. Sew side and bottom seams.

The start of the seam can be awkward, so I used a sewing gauge to get it going. Also, use the sewing gauge as needed to complete the seam.

9. Clip corners and trim seam allowance.


10. This is the hardest part. Turn the purse pocket. I used the rounded end of a metal skewer, pushing and tugging, tugging and pushing, until it finally turned. This took longer than all of the other steps combined.

Tada! Finished. What uses can you come up with for this?


Notes:

The pocket I used on this only had about 1/2" seam allowance around the sides and bottom. By increasing that to closer to 1", it would have been much easier to sew and turn.

The fabric that I used is Michael Miller's Seafarer Circles. The design and colors are so fun and summery!

Pencil/Purse Pockets

A few months ago, one of my mom helpers commented the chairs I recovered for my classroom. They were two old teacher chairs that were doomed for the trash. The design on the brown chair is from (I think!) Ann the Gran and I did the wording on the orange chair from Embird’s Font Engine.


This mom said she had a lot of jeans pockets left over after she had made some denim throws. Was there anything we could do with them for the class? I told her I would come up with something. This past school year was very demanding in many ways, and my creativity at a standstill. So, I asked Kay to help me come up with an idea. Her first suggestion was a winner: fold them in half and sew them.

Here is the prototype. Easy peasy, cute, and fun! I cut up a bunch of squares from a variety of fabrics, and brought in several different ribbons. The kids chose their fabrics and ribbons, I sewed the top seam, and my mom helper sewed the rest. On the last week of school I supplied the students with fabric paints and they put their names on their pencil pockets. During the craziness of the last week of school(not to even mention boxing up the entire classroom for summer construction), I neglected to get photos of all 24 pencil pockets.

If you like this project, stay tuned for a tutorial! These are a great size for slipping into a purse.

Wednesday, June 10, 2009

Back to the World of Blogging

This is the third week of summer break and I’m really getting into the creative mode…slowly. OK, let’s face it that I’ve been slow about everything since the school year’s been out, which really makes the time fly by. Go figure!

I have some really awful photos of some parent helper gifts that we (me & my partner in crime at 3rd grade) gave for the end of the year. I started early, but ended up finishing/wrapping them at the last minute in the craziness called the last week of school, thus no decent pictures. And NO photos of a couple of the gifts.


For my mom who came in weekly to work with reading groups (among other things!): Above is the “Grrlfriend Market Bag.” The pattern can be found on Ravelry. I knitted a flower from Stitch ‘n Bitch Nation and put the funky big button in the center. The colors are bright, fun, and remind me of citrus fruits. I asked one of my sisters and a friend of what I should put in the bag. My sister Kay suggested the makings of an Italian dinner, and my friend Tonia suggested gardening tools and supplies, since when I asked her, she and her DH were in the process of planting their first ever vegetable garden. (Which gave me an idea for her and I’m almost finished with that something…come back later this week for photos!) I went into my local supermarket the morning of the last day of school, thinking I was going to load this puppy up with the makings of a pasta dinner. As I walked into the store, there was a display of plants, so the bag ended up holding a gorgeous spider plant. I knew this mom would be appreciative, but I did not expect her tears after I answered her that I made this. Yeah! Knitting was appreciated.

My gift from the mom above (and the rest of the family) was the Hello, Cupcake! book. Too fun! I’m not sure what I’m going to make first, but I will do something for a reunion that DH and I are semi-hosting at the end of this month for a bunch of people from our old neighborhood. The other part of the gift from this family was Eric Carle’s The Rabbit and the Turtle. On the last day of school, I only read one of the fables to the kids, but they liked it and were quick to articulate the moral of the story. Yeah! Guess I taught them something this past year. Back to the books…this mom wrote a personal note in the front of both, then signed by all of their family members. Not only am I thankful for the generous gift of the books, but am humbled by the thoughtful inscriptions.


The above set was for another mother who came in most Fridays to do copying, or whatever else we needed done. I’d made the Flower Power face cloth for myself a few years ago and LOVE it! For this, I made it bigger so it’s more of a washcloth, then made a cotton face cloth. The other item is a shower soap holder, which I just cast on and made up as I went along. I must admit, that I really like the little tags that I made up with fiber content and laundry instructions. The first photo is pre-blocked, and it really made a huge difference in looks after the blocking. The other thing I wanted to add to this was a spa head band, but in my limited time in creating this gift, I just could not get my brain to figure out how to do exactly what I wanted to do. Guess that’s on my “to-do” list now. This wonderful mom gave me…are you ready for this?!?!...a gift certificate for a massage! It’s been years since I’ve had one and am drooling over the prospect of setting my appointment.

Another parent gift was an apron and towel…sorry, no pics. I machine embroidered fruit slices (yellow, orange, and green) on one bottom corner of the apron and on the towel. She loved it, as I have loved her homemade BBQ sauce and jams! She gave me a gift certificate that I still need to use. Woohoo!


The final parent gift was a wine basket, and no photos here, either. This was for a mom who made lapbooks (the link gives you an example of what they are and the work involved in putting them together!) for the entire grade level, for the entire year’s language arts curriculum. 6 units x 50 students = 300 lapbooks!!!!! AND, she’s going to make up the first set for next year to get us started. My partner in crime at work, Joy (a non-drinker), loves to shop for unique wine bottles. She bought a couple of bottles of wine, a couple of wine glasses, along with a GREAT basket. I added in 6 cocktail coasters that I designed and digitized…machine embroidery, along with two bar towels that I embroidered my designs on it. Plus, I made up 6 wine glass charms. I think she liked it, based on her thank you note:

How do I say OMG?!?! The gift basket is unbelievable. Totally, the coolest! Thank you so much. Everything in there is sooooo cute. Truly unique and special. I'm not sure I want anyone else to use the coasters or towels. You guys think of everything. I just love it. You guys are awesome!

As I venture into this realm of designing and creating, it’s a great affirmative for what I’m doing. Now, just to keep up (or get!) some momentum to continue with my original ideas.

So many projects and so little time.